Heads up! This content is relevant for Clipchamp for personal accounts. Try this link If you're looking for information about Clipchamp for work accounts.
On this page
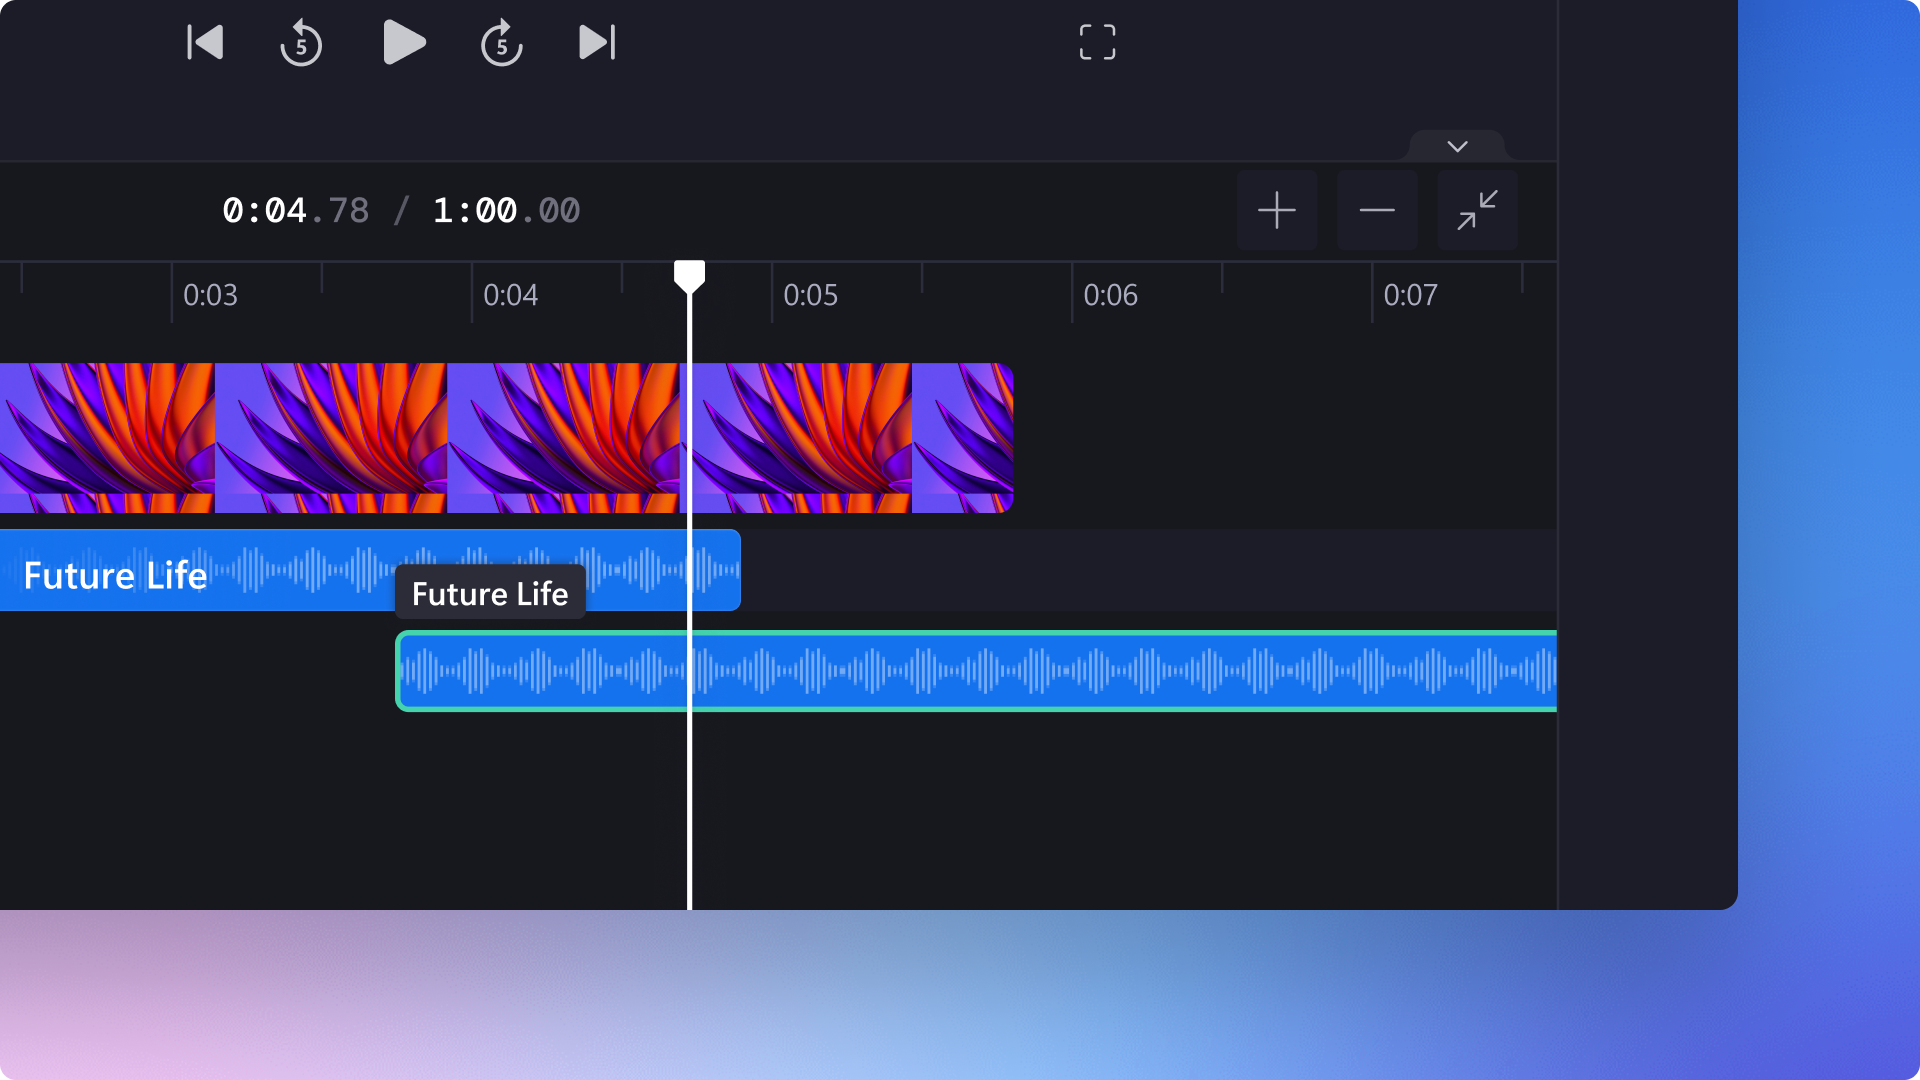
Want to enhance your video’s wow factor with the help of audio? From social media Reels and Stories to educational videos, turn any video into a masterpiece with our easy and practical audio editing hacks.
This helpful list is full of fast, free, and easy audio editing hacks to level up your videos using Clipchamp. Explore audio editing hacks, like adding audio echoes, fades and making a text to speech voiceover for vlogs.
Practical tips to transform your audio
Remove silences and pauses in audio
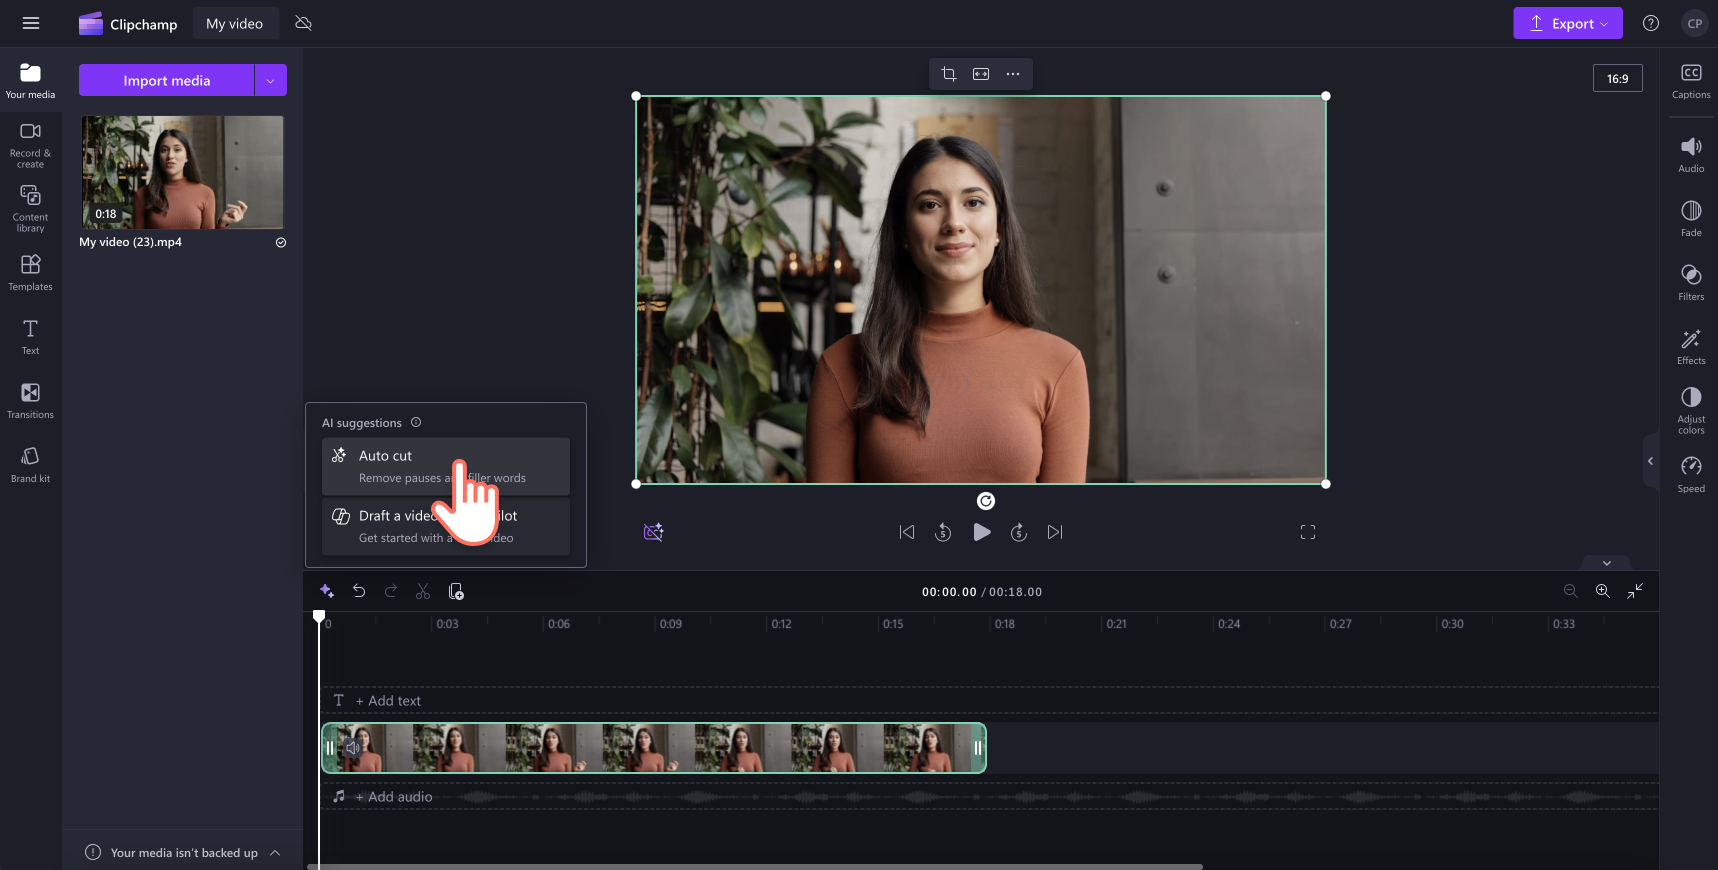
Automatically find and delete long pauses and awkward silences from your videos and voiceovers without re-recording or cutting media with silence removal. Quickly clarify and polish any audio like meetings, tutorials, and podcasts in seconds with just a few clicks.
Click on the sparkle icon button, then click trim and tidy.
Choose a language, filter profanity, then click on the transcribe button. The AI editing feature will automatically start filtering through your video to find any pause or silence that’s longer than 3 seconds.
Preview found pauses, then click remove. You can also click removal all to back delete audio silences.
Your video will now appear split into multiple clips on the timeline with silences removed.
Separate audio from video in seconds
If you’re unhappy with your video’s audio, don’t worry about re-recording the entire video. Easily remove mistakes and unwanted audio from your video with our separating audio and video hack.
Just click on the detach audio button on the property panel, and your video audio will turn into a separate asset on the timeline.
You can also detach by right-clicking on the video on the timeline, then clicking the audio button, then detach button.
Mute specific audio in your video
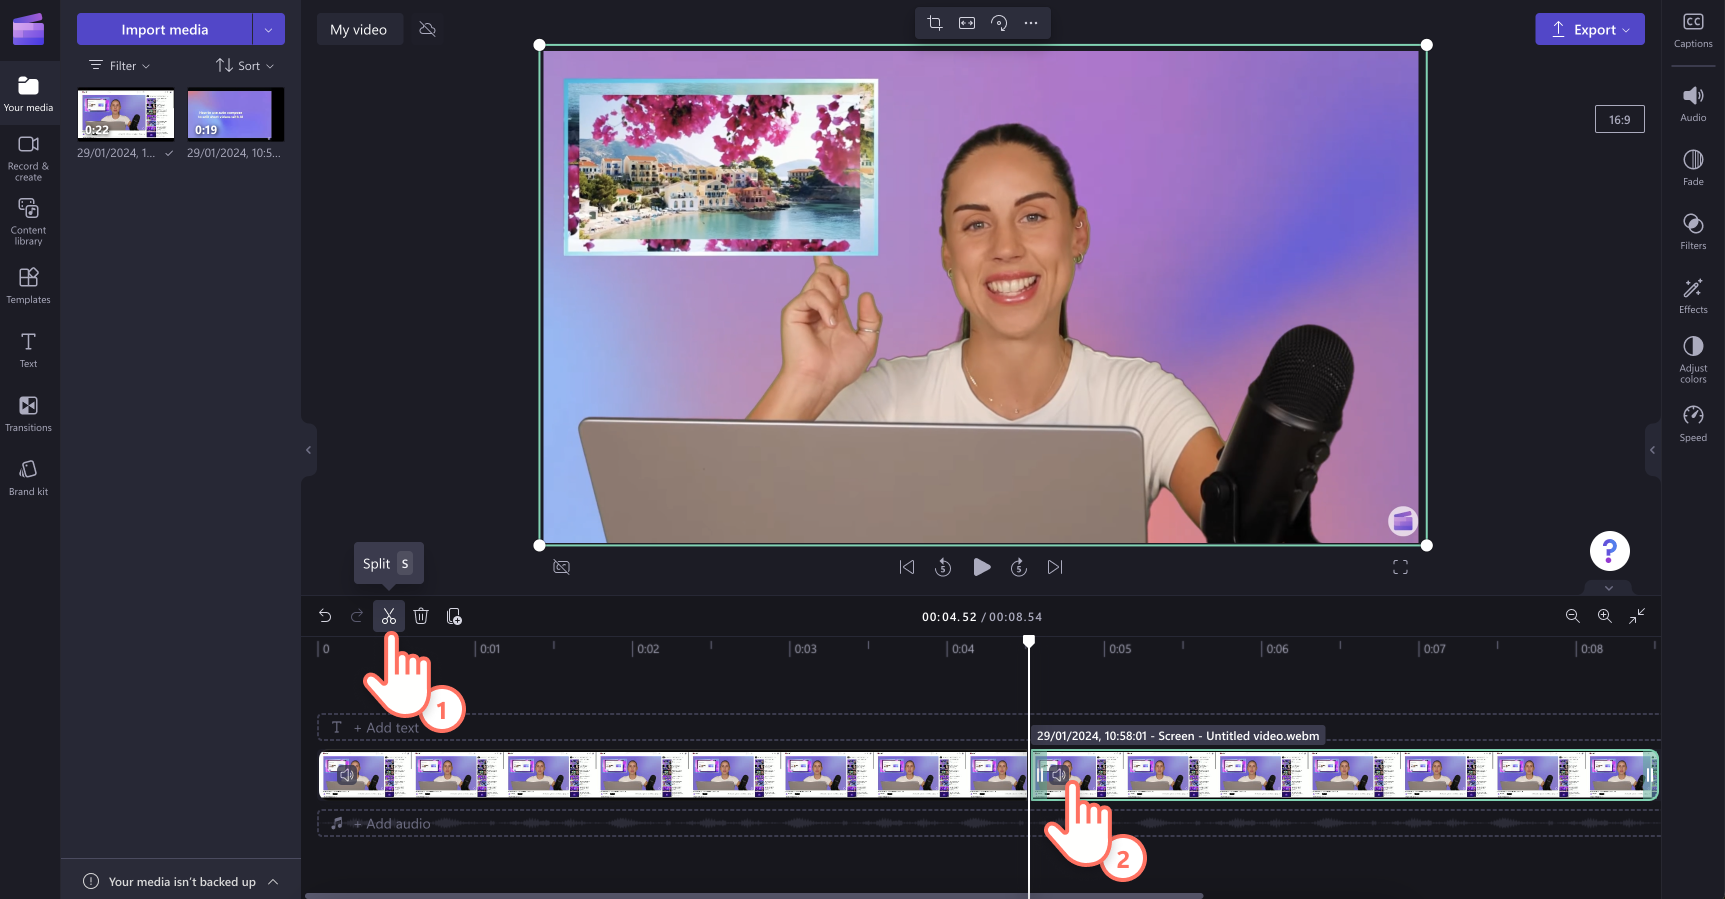
Want to remove profanity, and mistakes or turn the sound off for another audio to play? Quickly mute specific audio using the split and mute tools.
Move your seeker to the start of where you want to mute.
Click the scissors icon, then move your seeker to the end of where you want to mute and click the scissors icon again. Your video and audio should be split into three sections.
Click on the timeline asset so it’s highlighted in green, then click the mute button.
Learn more about muting videos in our YouTube tutorial.
Creating audio echo
Adding an echo effect to your audio is a simple way to enhance the mood and vibe of your video. We recommend using the audio echo hack with sound effects and SXF audio files.
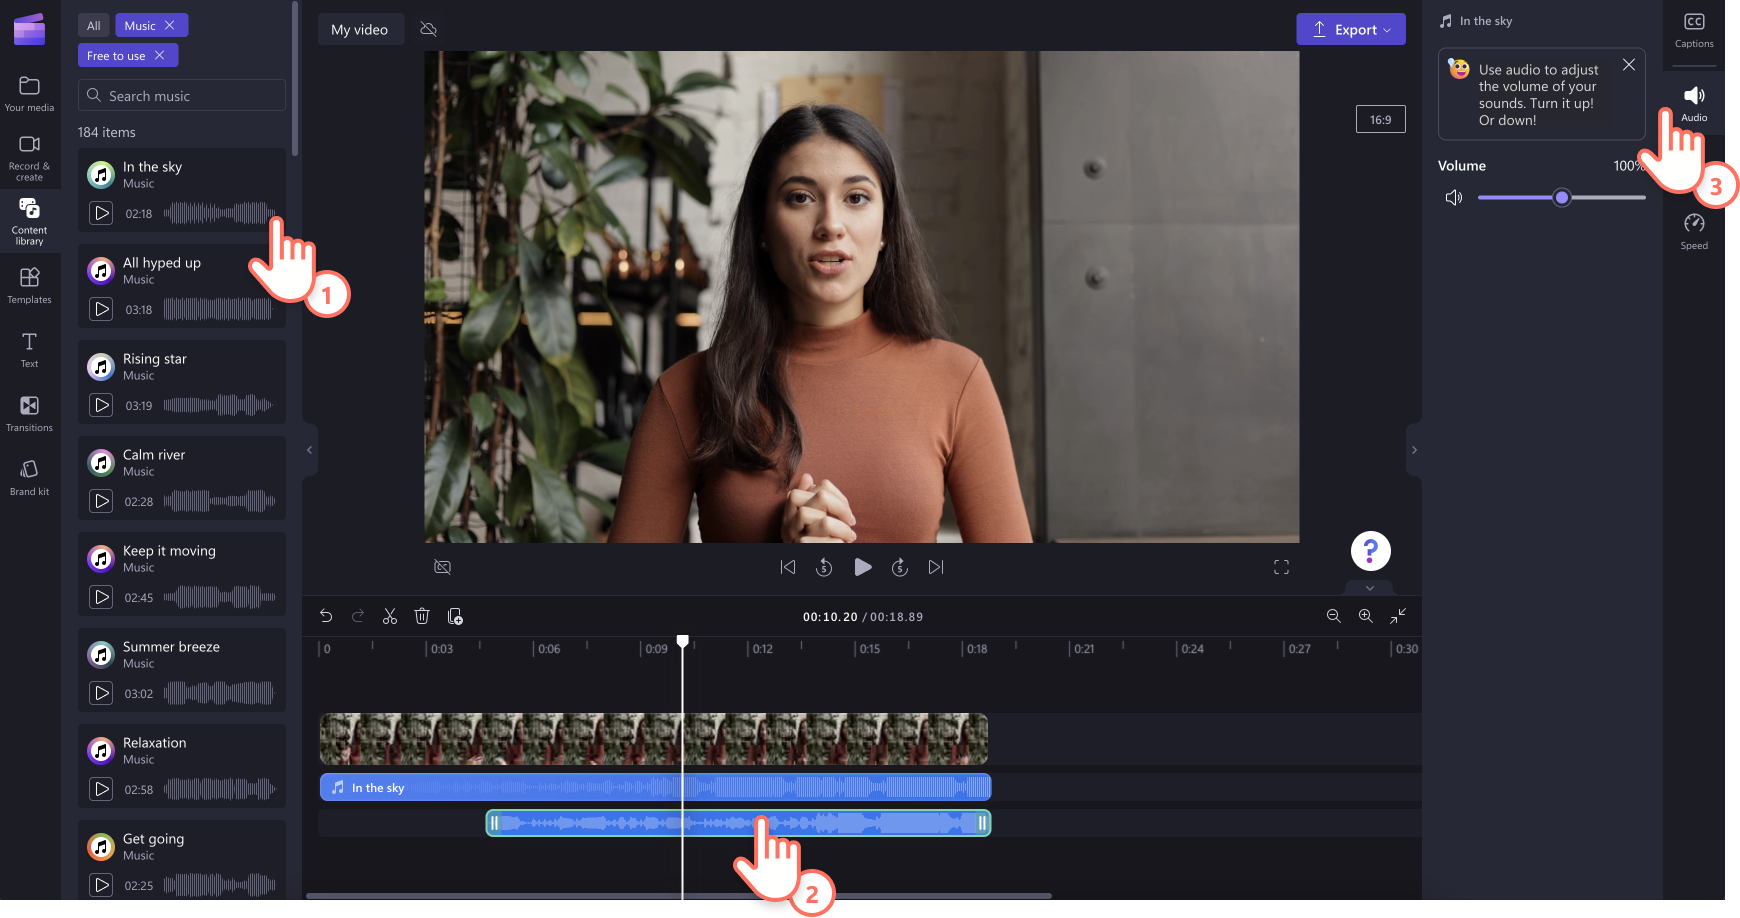
Click on the content library tab and search through our stock audio options.
Drag and drop your chosen audio file onto the timeline.
Drag and drop the same audio file again onto the timeline below the existing audio file but place it a few seconds later.
Use the text tab on the property panel to edit the volume of your audio file.
The two audio files will create an echo effect as they play together, but at different timestamps.
Speed up and slow down audio
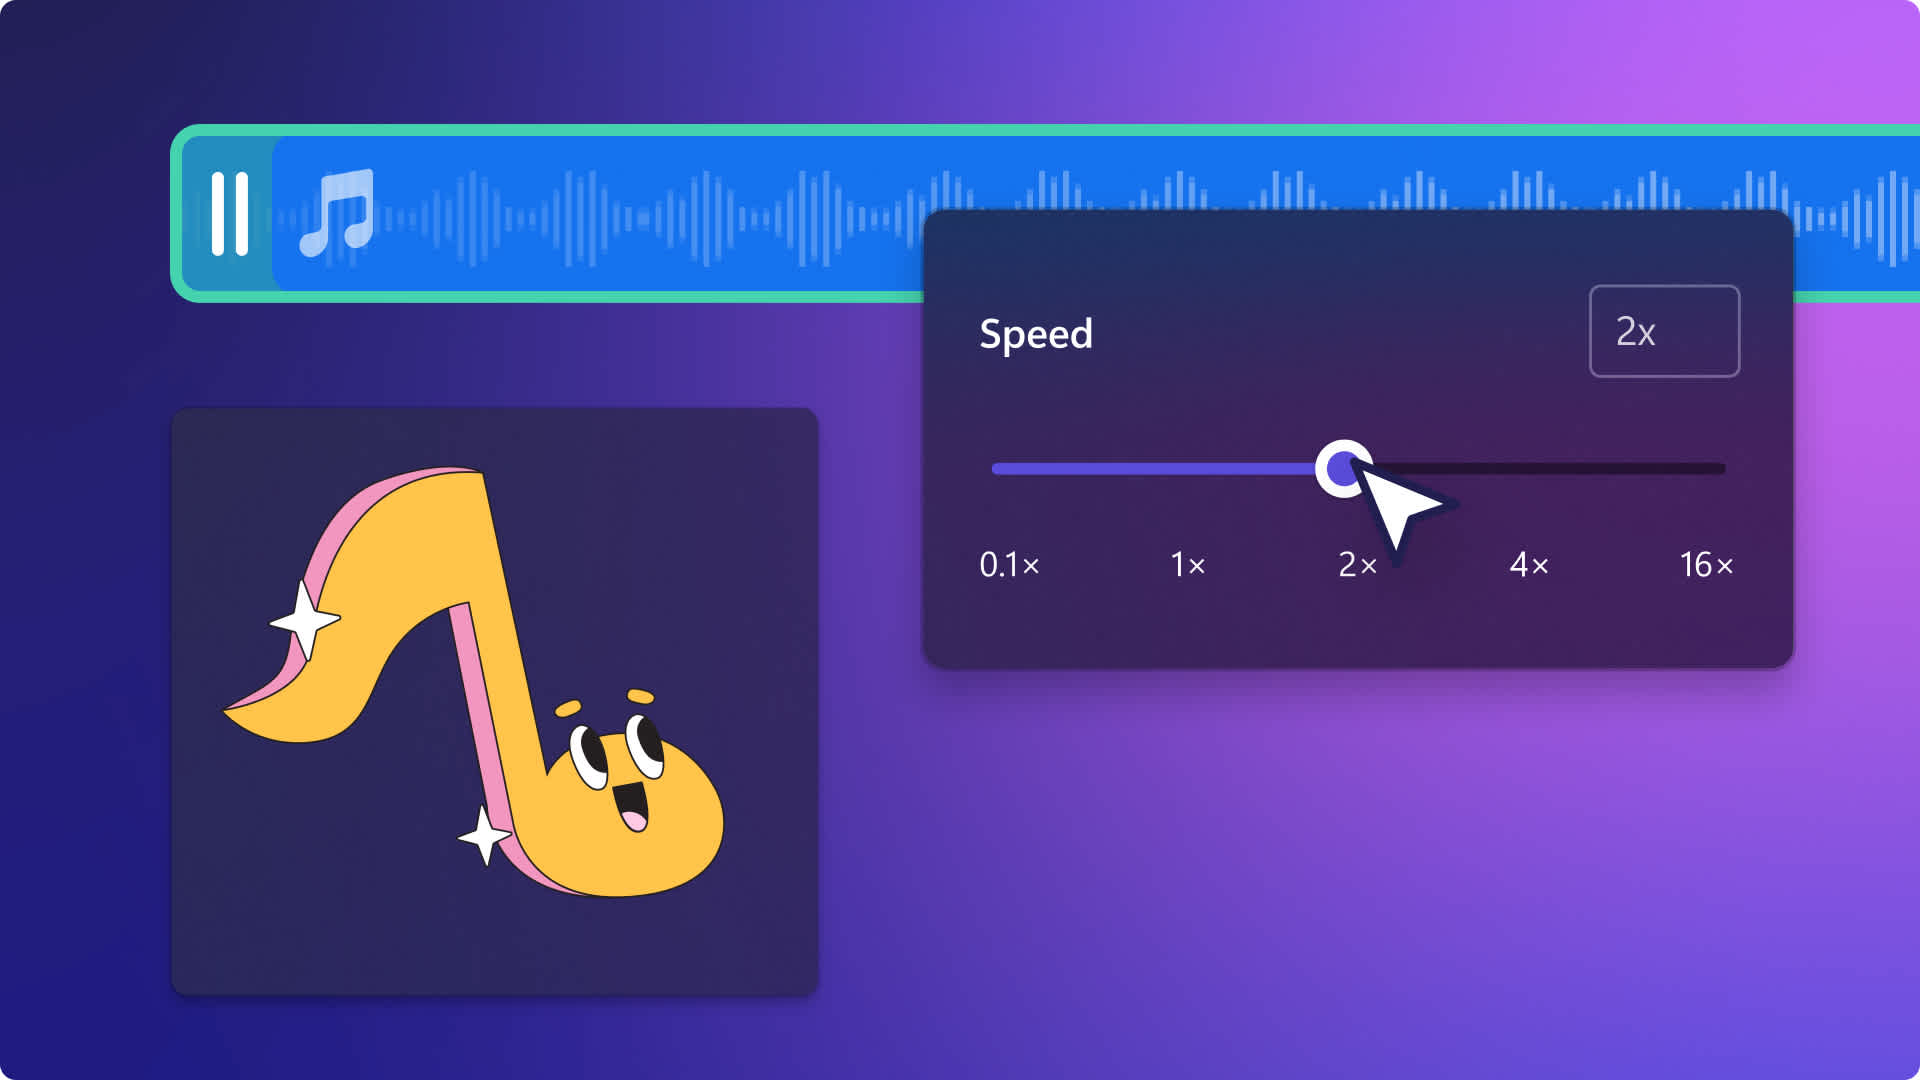
Is your audio speed too fast or too slow? Easily adjust the speed of your video audio with the speed controller.
Start by detaching the audio from your video. Click on the audio tab on the property panel, then click on the detach audio button.
Next, click on the audio file on the timeline so it’s highlighted in green.
On the property panel, click on the speed tab.
Customize your audio speed anywhere from 0.1x to 16x the speed.
Re-record your own voice
Want to remove mistakes from a video, place better quality audio in a section of your video or dub a video in another language? Simply record your voice again while video editing.
Start by detaching the audio from your video. Click on the audio tab on the property panel, then click on the detach audio button.
Play the audio file to find the section that you'd like to replace and split the clip.
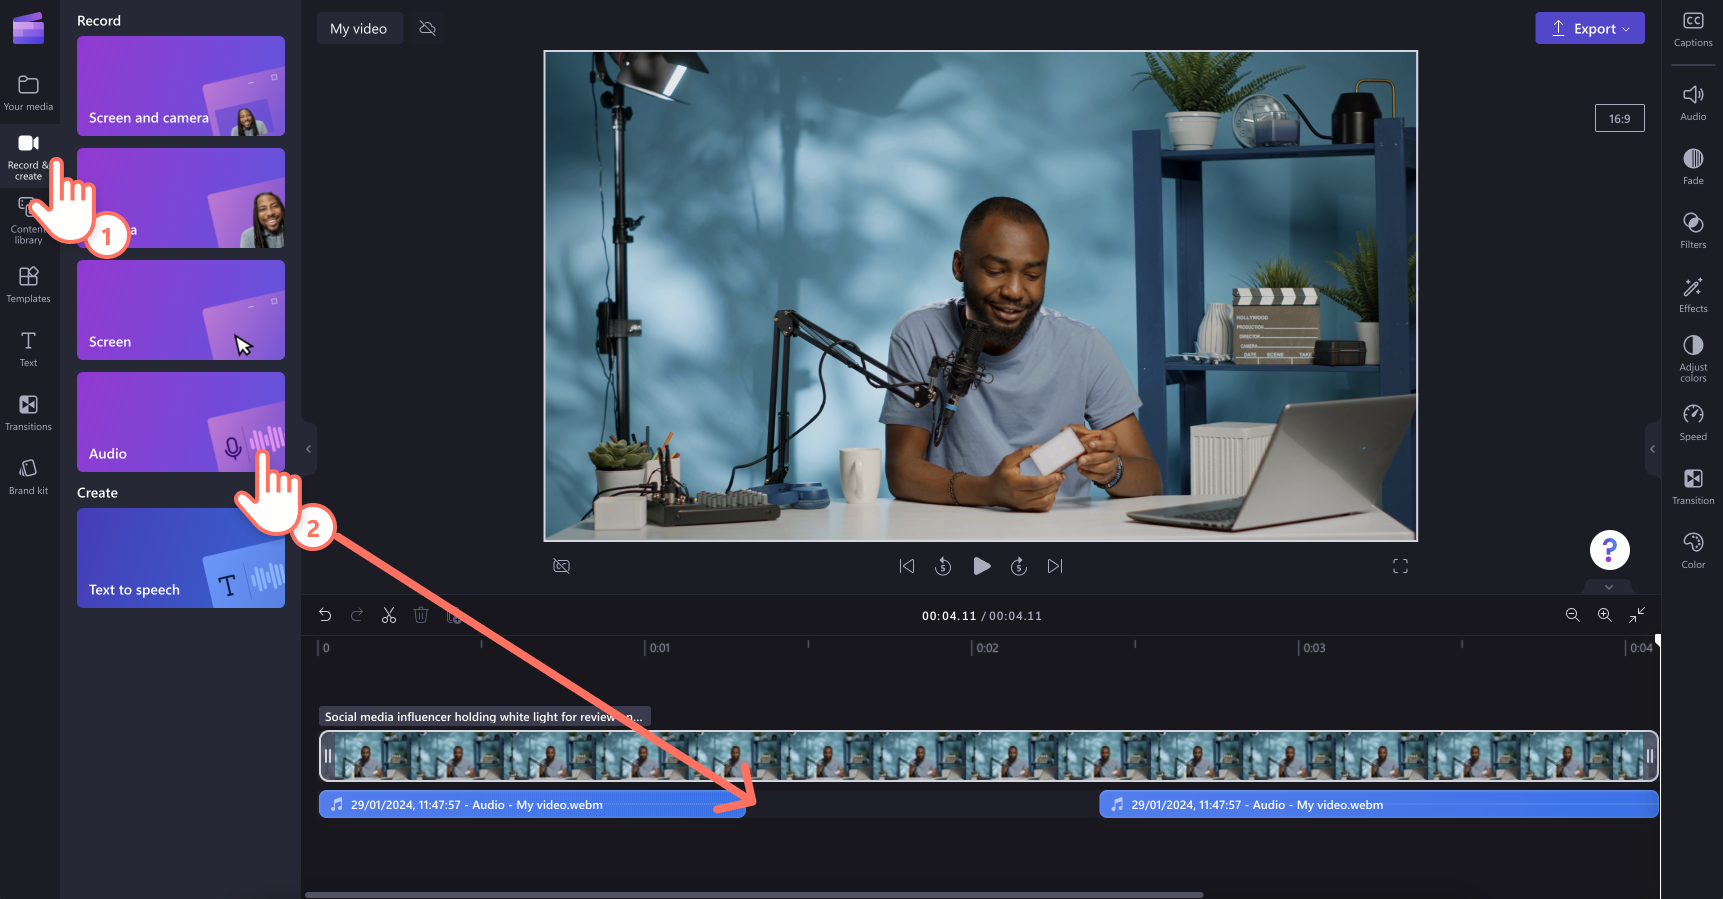
Find the voice recorder in the record & create tab.
Click on the red button to start recording your voice in the pop window.
Click on the save and edit button to save the audio and return to the editor.
Place the new audio recording in the desired section of the video.
Production tips to improve your video flow
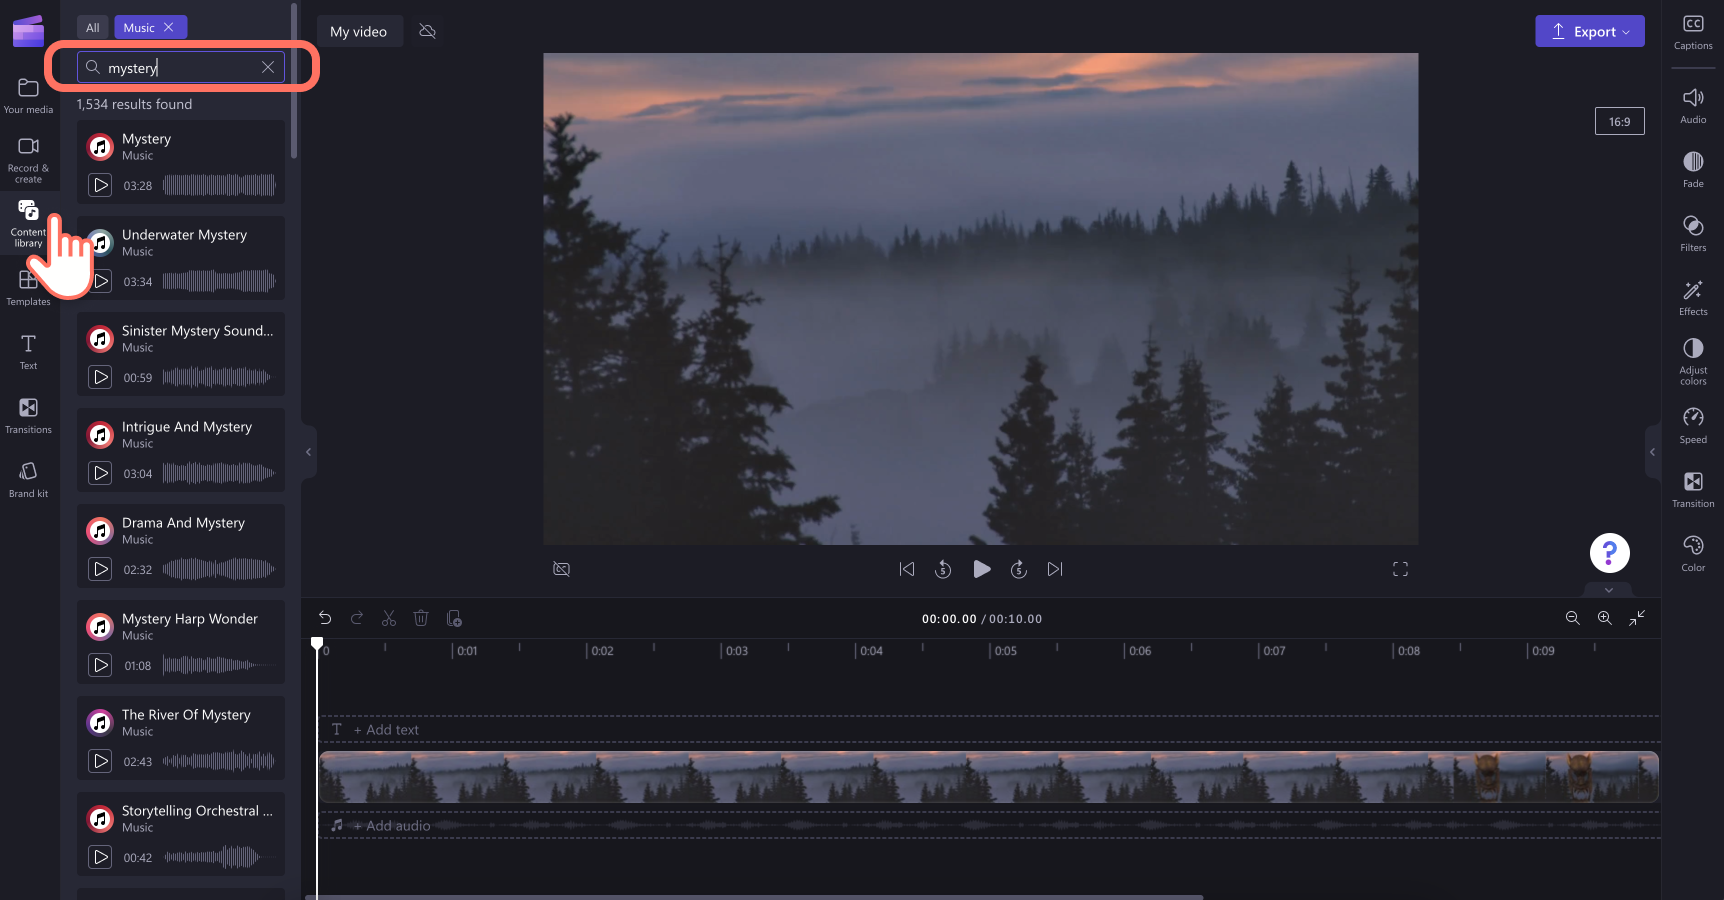
Stock audio keyword search
Finding the right audio track can sometimes be a time-consuming task. But with the help of our keyword hack, you can find the right tune in seconds. Instead of searching for an instrument like ‘guitar’ in the stock search bar, try searching for a mood instead like ‘inspirational’ or ‘romantic’. Choosing the right keywords to search can find the right audio to bring your vision to life.
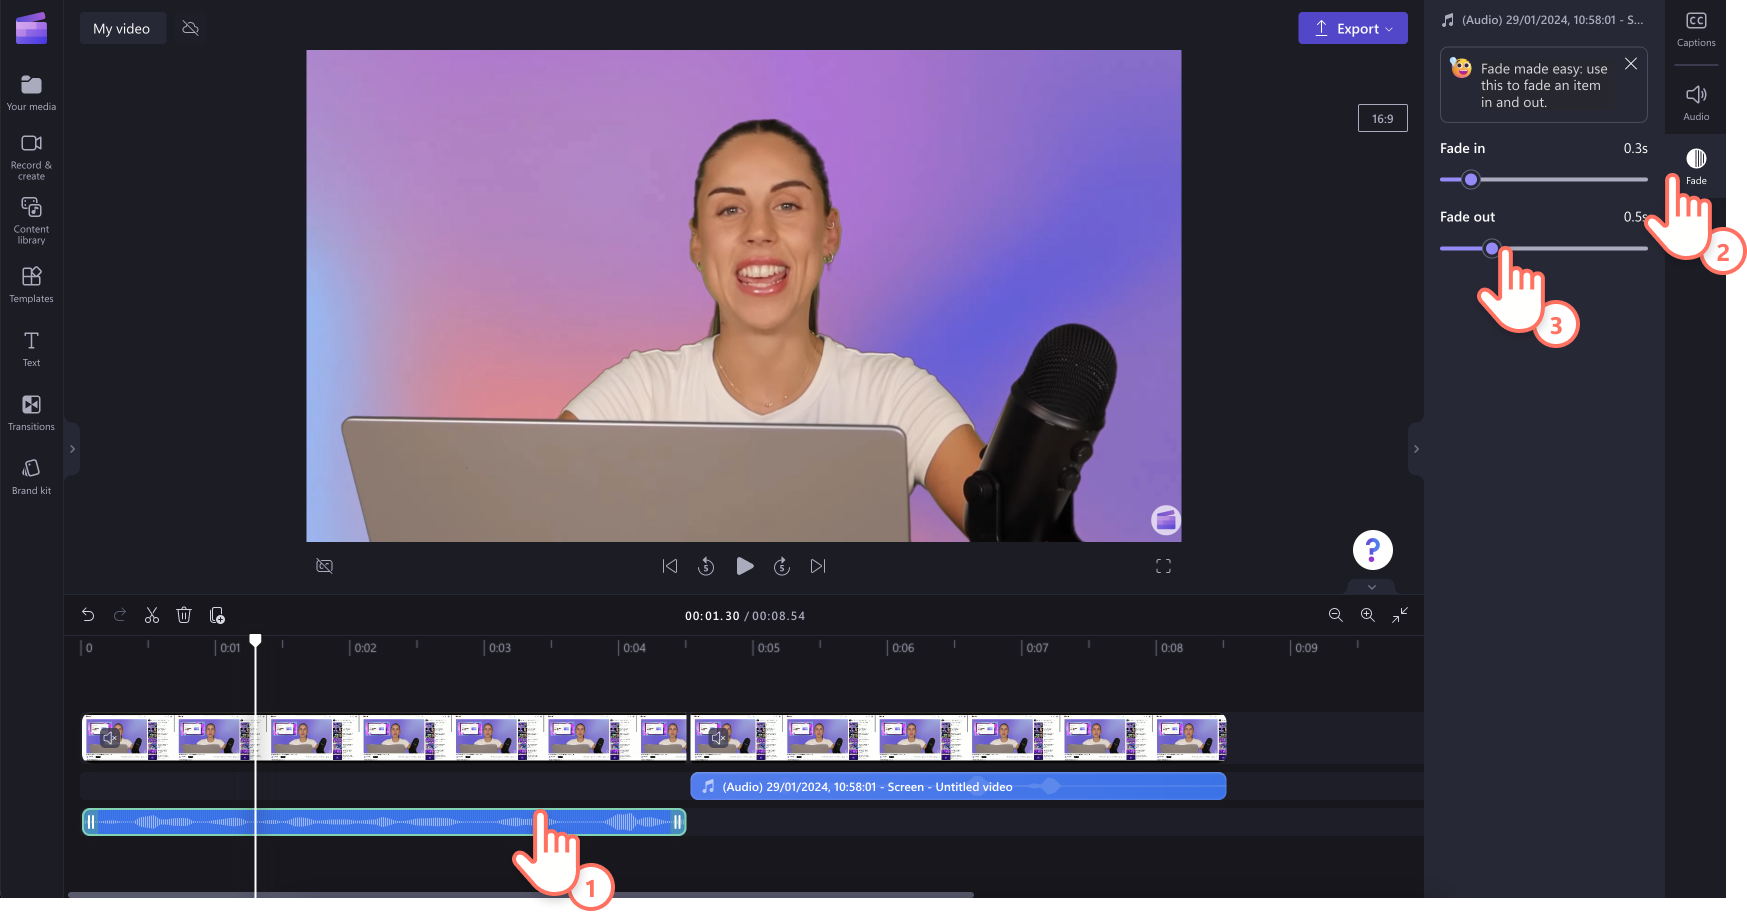
Fade in and fade out audio tracks
Improve your viewer's experience by fading in and fading out your audio tracks. Just like fading your video clip out into a black screen, you can also fade your audio.
Click on the audio track on the timeline so it’s highlighted green.
Click on the fade tab on the property panel.
Slide the toggle right to add a fade in or fade out to your audio.
Lowering the volume of background music
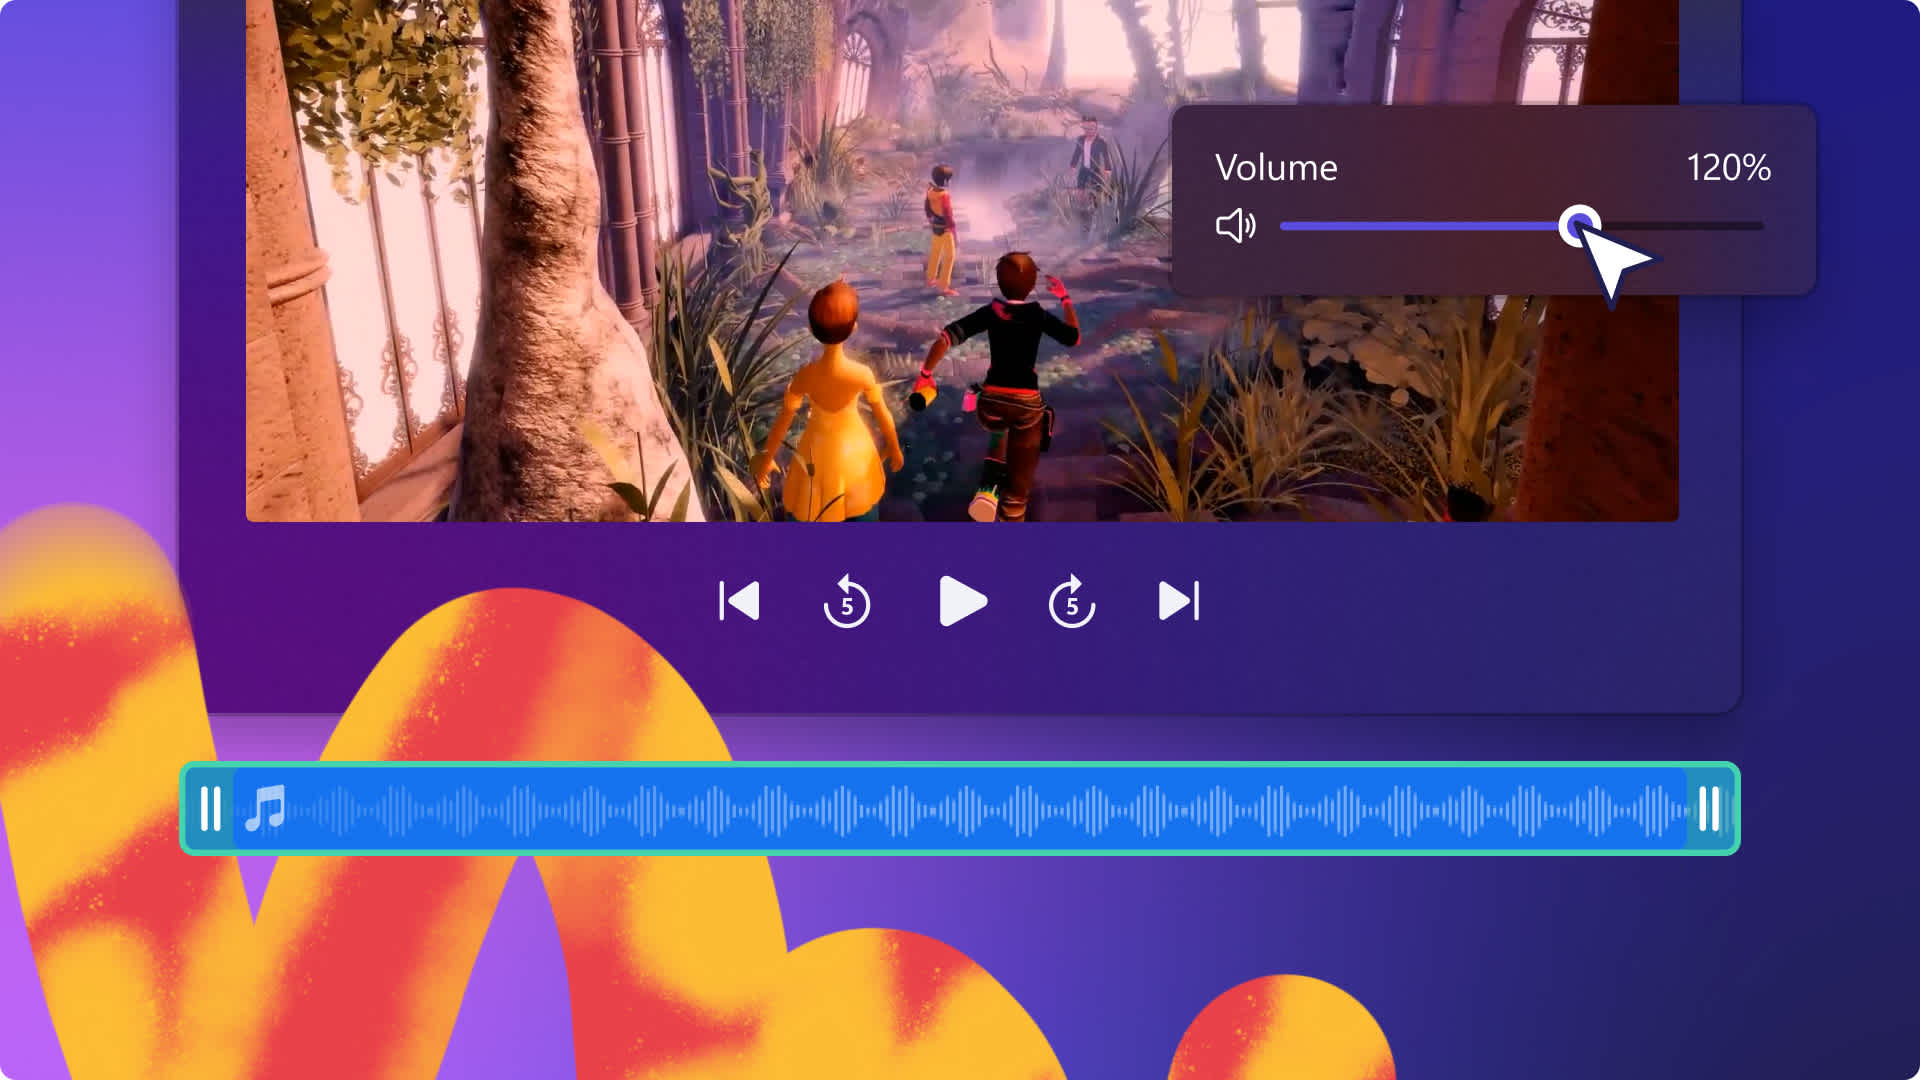
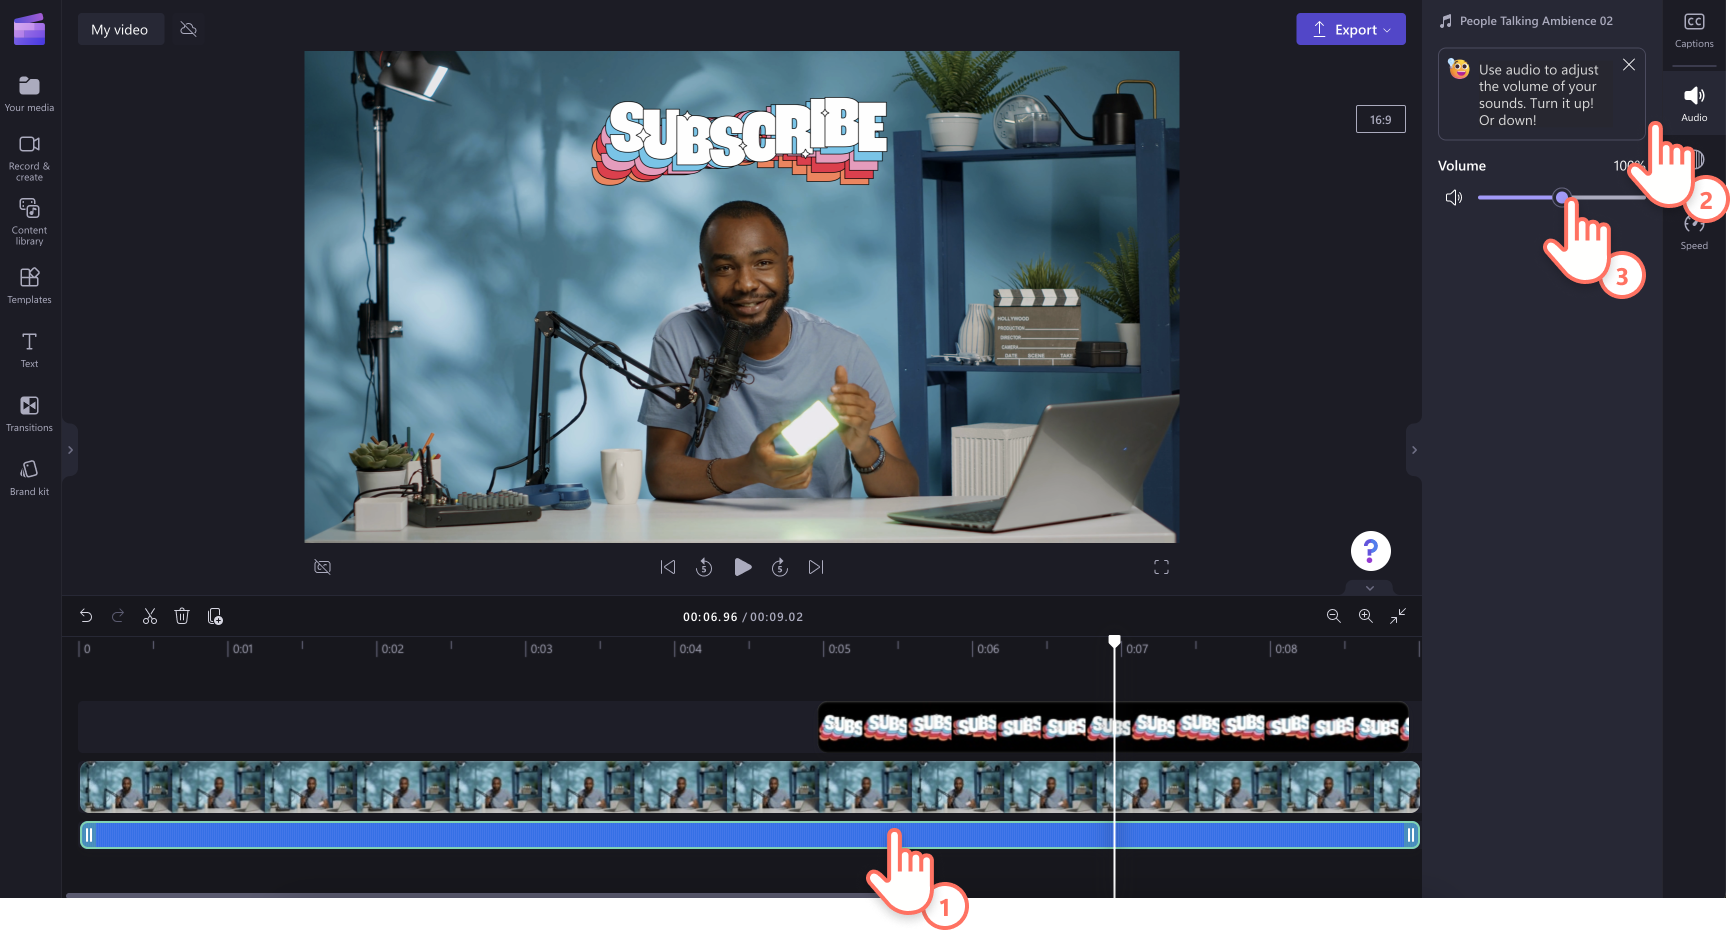
Sometimes adding background music to a video with existing audio can be hard for viewers to understand. That’s why with Clipchamp, you’re able to turn down the volume of your background music, without affecting the volume of your video.
Drag and drop a stock audio file from the content library tab onto the timeline.
Click on the audio file so it’s highlighted green.
Click on the audio tab on the property panel.
Using the slider, turn down the volume of your audio file. Moving the slider to the left will lower the volume and sliding it to the right will increase the volume.
Vlog audio editing tips that stop the scroll
Stock video overlayed with audio narration
If you’re creating long-form videos like interviews, vlogs, or anything corporate, keep viewers entertained by overlaying your audio narration with stock video. Sometimes talking to the camera can become repetitive to watch, so add our royalty-free stock video in sections instead.
First, detach your audio from your video. Click on the detach audio button on the property panel, and your video audio will turn into a separate asset on the timeline.
Next, split the video footage you would like to add an overlay to.
Drag and drop a stock video onto the timeline to replace the existing video.
Transitions with sound effects
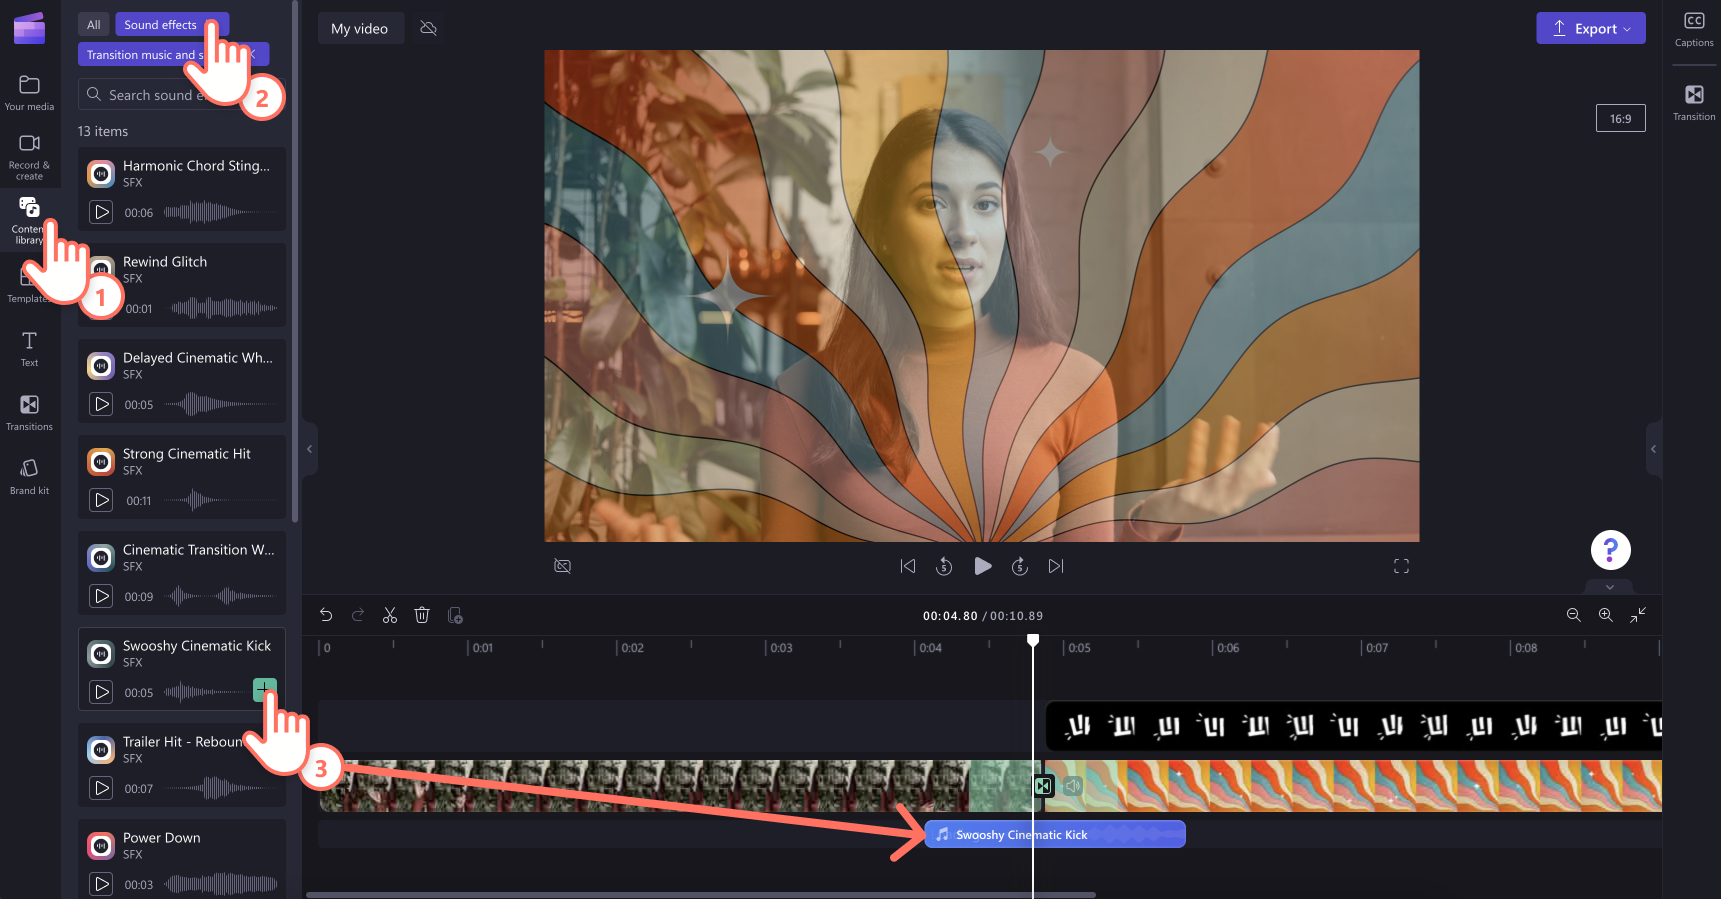
Adding transitions between video clips when a change of topic or scenes occurs is a great way to improve your viewers’ attention. And with our SFX sound effects, you can even level up transitions with simplistic sounds like a swoosh, ding, or pop.
Drag and drop a transition between your video clip on the timeline from the transitions tab on the toolbar.
Click on the content library tab, select sound effects from the audio drop-down menu and keyword search a sound effect.
Drag and drop an audio sound effect onto the timeline under the transition.
Add text to speech voice overs to your vlogs
Detach and replace any dialogue in your video to break the monotony with our free text to speech generator. Create a voiceover from a huge range of unique voices in a variety of languages, accents, tones, and speeds to capture the attention of your audience and make your videos more inclusive and accessible.
First, detach your audio from your video. Click on the detach audio button on the property panel, and your video audio will turn into a separate asset on the timeline.
Next, split the audio file to which you would like to add a voiceover. Delete the split audio from your timeline by clicking on the trash can icon.
Click on the record & create tab on the toolbar, then click on the text to speech option.
Create a voiceover by following the text to speech prompts.
Drag and drop your voiceover onto the timeline in the space where your deleted audio was.
Remove background noise from vlogs
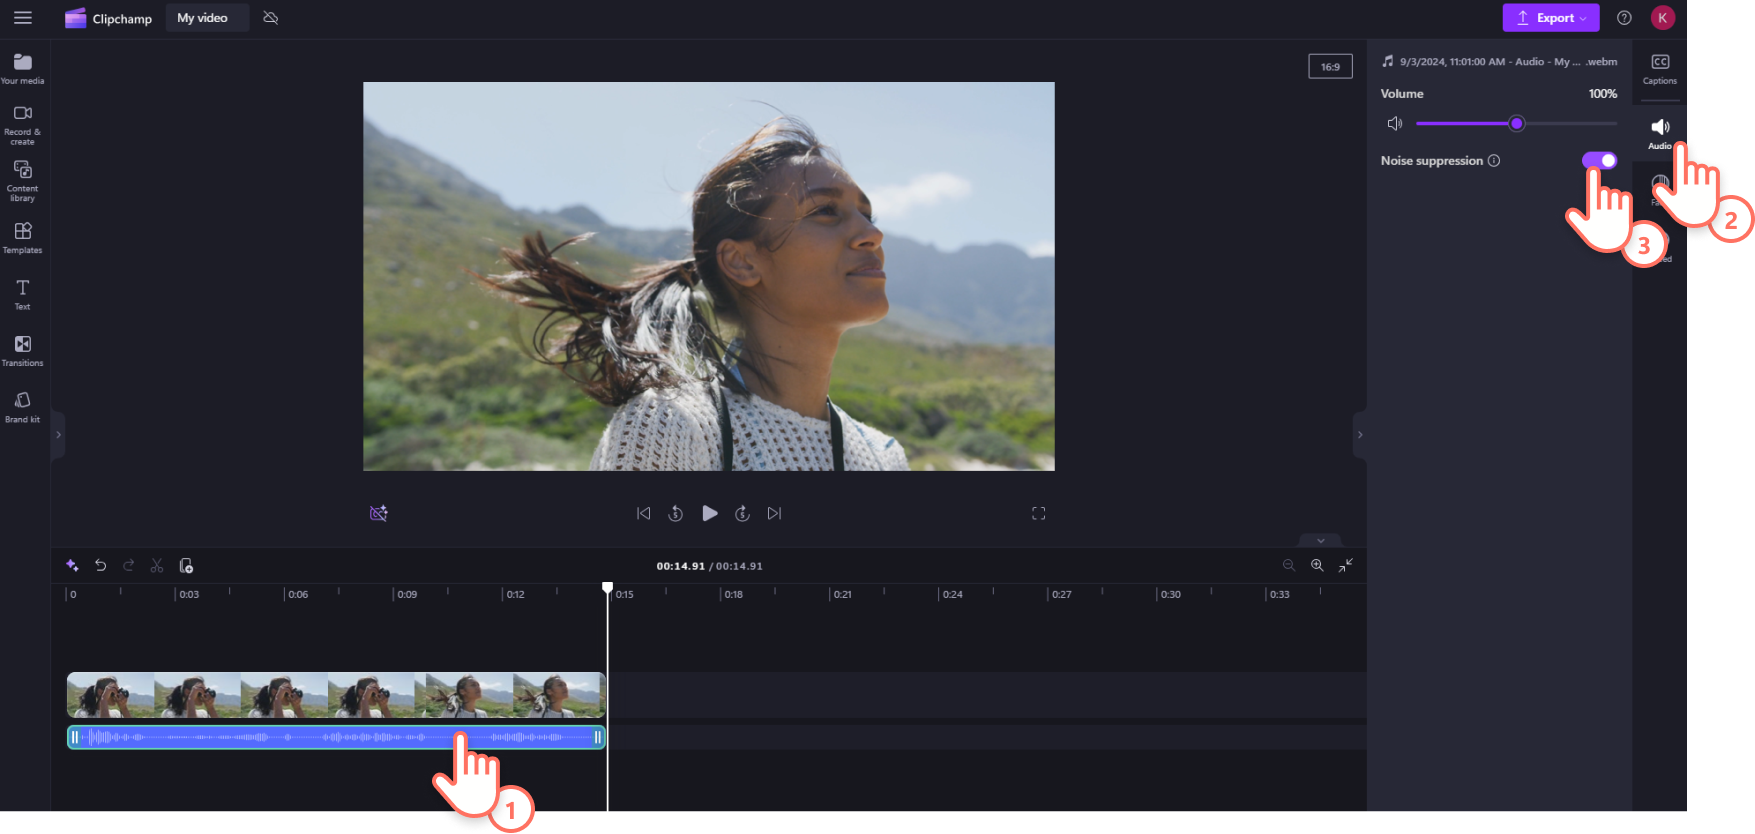
Minimize or delete any unwanted ambient sound from your video footage with our AI noise suppression tool. Remove loud background noise like wind and traffic and improve the clarity of your voice in a few clicks. Record vlogs and videos on the go outdoors on busy city streets without needing a lapel or boom mic. Separate your audio file from your video footage and clean it up for a clean and clear voice recording.
1. Separate your audio from your video. Click the video clip in the timeline. Selecting the audio tab on the property panel, then click the detach audio button.
2. Your audio will become an independent track in the timeline. It will automatically download to your device as a separate MP3 file and appear below your video clip on your timeline.
3. Now you apply the noise suppression tool. Click the audio file in the timeline so it’s highlighted green. Next, click the audio tab on the property panel where you can toggle on noise suppression which will automatically erase unwanted background sounds. You can also adjust the volume of your audio file.
To explore more audio features in Clipchamp, check out our free audio visualizer.
Edit your videos today with Clipchamp for free or download the Clipchamp Windows app.


